Crispy Cheese Sticks Recipe with Mozzarella & Peri Peri Flavour
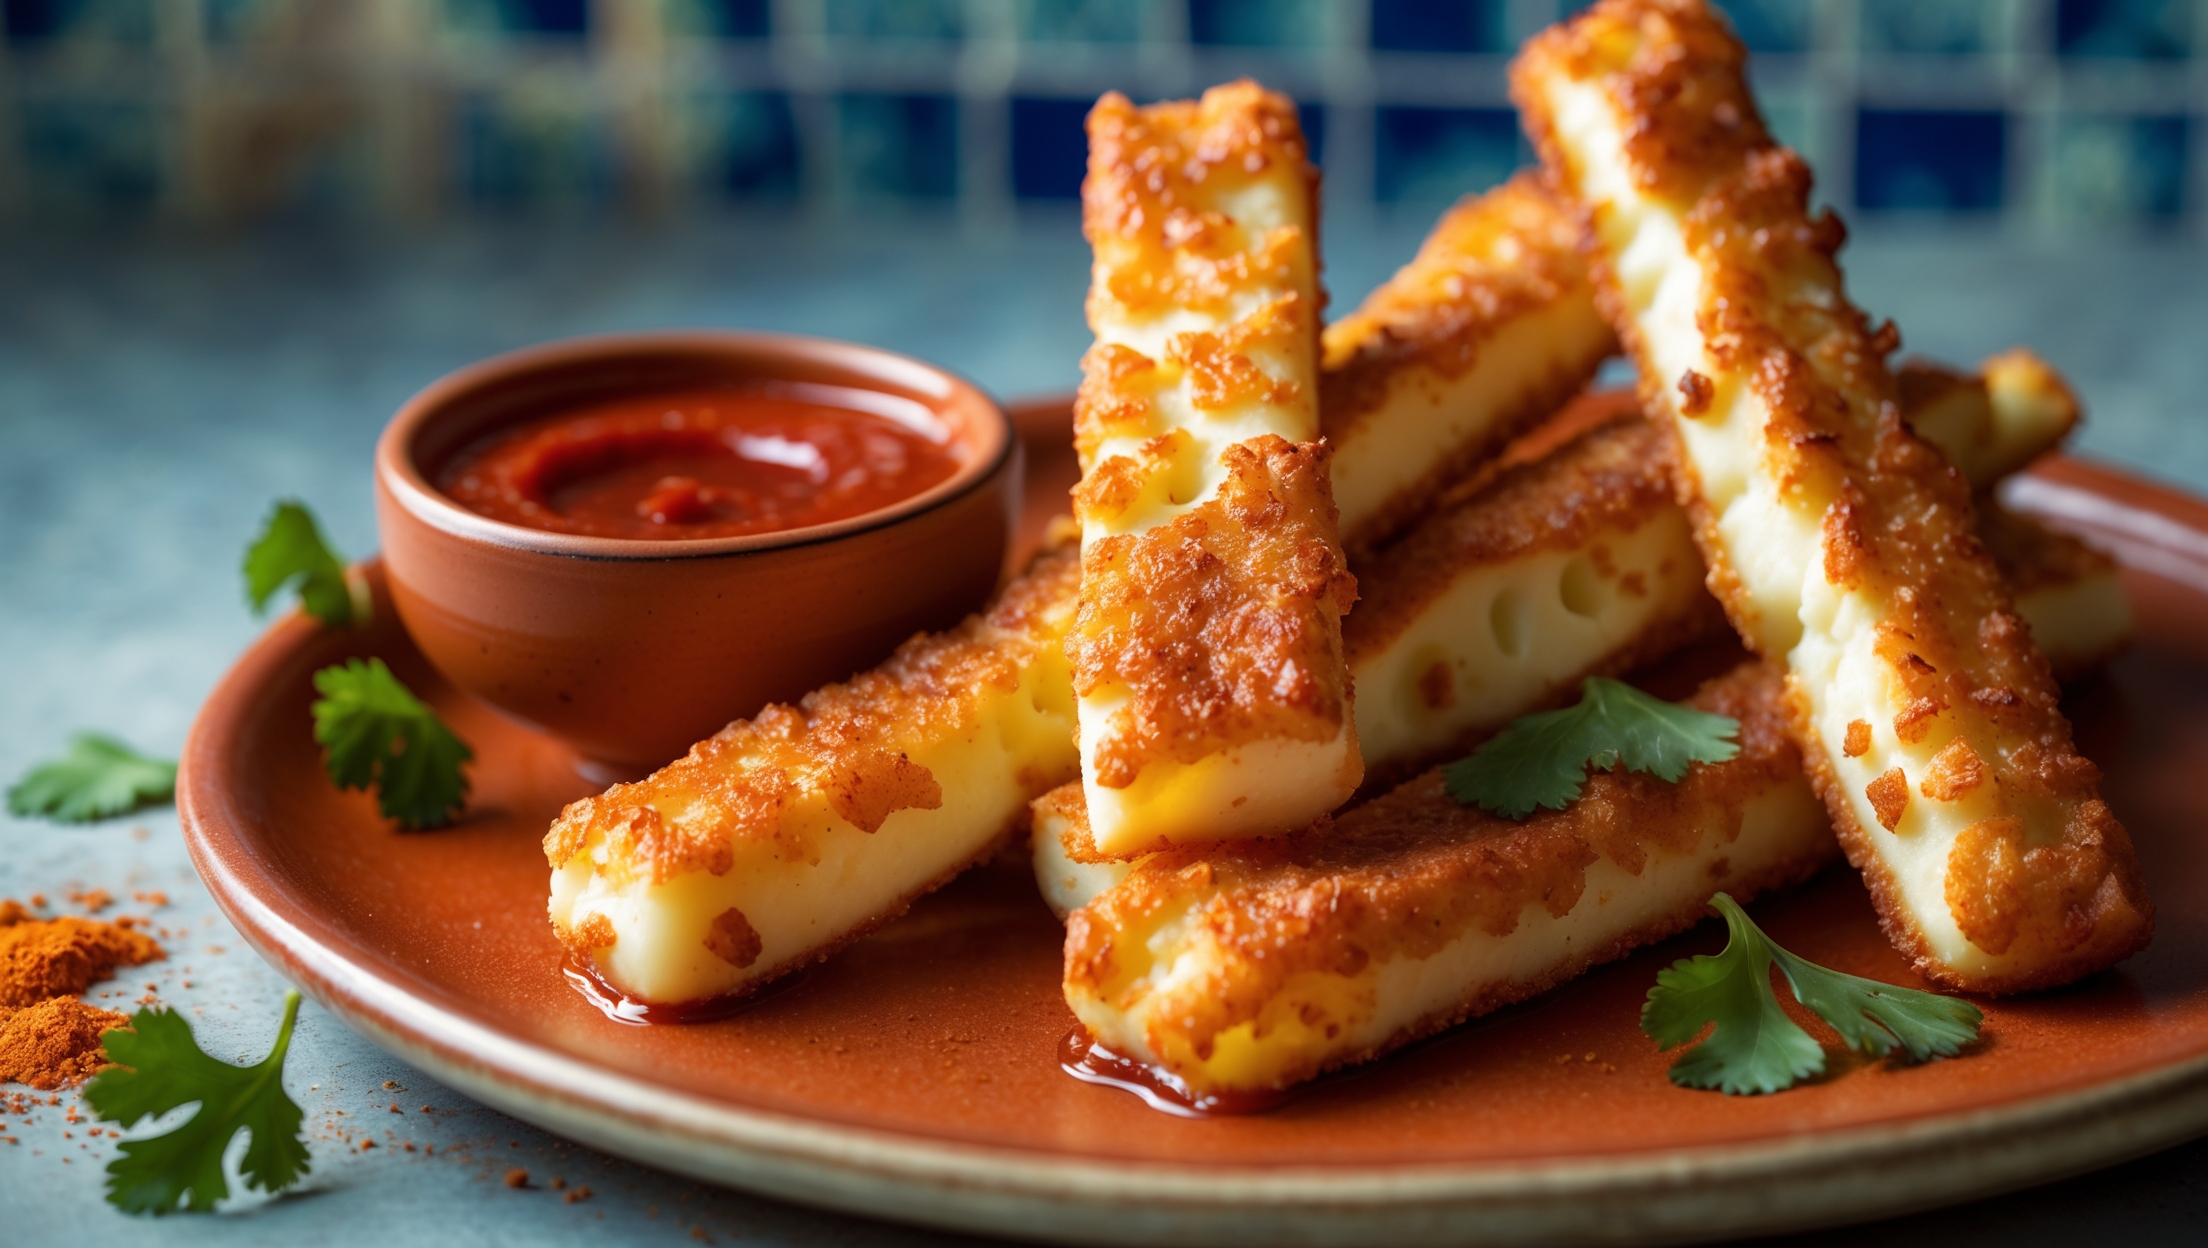
If you’re after a golden, gooey snack that’s quick to whip up and bursting with bold flavour, these crispy cheese sticks are just the thing. Made with flaky spring roll pastry and a rich cheese filling, these cheesy bites come in two irresistible variations. You can choose a fiery peri peri version or go for a more herby and classic take. Whether you’re a busy parent, a uni student, or a professional chef in need of a crowd-pleasing starter, this step-by-step guide will show you exactly how to make the ultimate vegetarian snack that is easy, satisfying and seriously moreish.
Crispy Cheese Sticks Recipe: Introduction and Overview
Why This Cheese Stick Recipe Stands Out
Everyone loves a crispy, cheesy snack, but not all cheese sticks are created equal. This recipe brings together the irresistible crunch of golden fried spring roll pastry with a rich, stretchy filling of grated mozzarella and cheddar cheese. What makes it special is the simplicity. You only need a few ingredients, very little prep time, and the recipe can be customised with two flavour-packed variations. Choose between a bold peri peri spice or a classic herb seasoning. Either way, you are guaranteed a satisfying result.
Who Will Love It, From Home Cooks to Professional Chefs
This recipe works beautifully for nearly everyone. Whether you’re preparing a quick bite for kids, offering party platters at a café, or looking to add a vegetarian starter to your restaurant menu, these cheese sticks are a versatile and reliable option. They are easy to make, freezer-friendly, affordable, and perfect for scaling up. Even if you’re new to cooking, you’ll find the wrapping technique straightforward and the ingredients easy to handle.
Ingredients and Variations for Crispy Cheese Sticks
What You’ll Need
Below are the ingredients you’ll need to prepare this recipe:
Main Ingredients
- 1 pack of spring roll pastry
Cut in half to create rectangular sheets - ½ cup plain flour
Used to make a flour paste for sealing - 3 tablespoons water
To mix with the flour for sealing
If you cannot find spring roll pastry, phyllo dough, or wonton wrappers can be used, although the texture may turn out slightly different
Filling Option 1: The Peri Peri Kick (Spicy)
This version adds a bold, spicy flavour, making it ideal for those who enjoy a little heat.
- 2 cups Cheesie Tops grated mozzarella and cheddar cheese
- 2 tablespoons plain flour
- Helps bind the cheese together
- 1 tablespoon peri peri seasoning
- Brings in a zesty, spicy kick
Tip: You can increase or reduce the heat depending on the spice blend you use
Filling Option 2: The Herby Classic (Mild)
A more traditional flavour combination, this option uses herbs for a milder, aromatic taste.
- 2 cups Cheesie Tops grated mozzarella and cheddar cheese
- 2 tablespoons plain flour
- 2 teaspoons onion powder
- ½ teaspoon garlic powder
- 2 teaspoons dried oregano
This blend creates a rich, fragrant filling that pairs well with a variety of dipping sauces.
Step-by-Step Cooking Method for Crispy Cheese Sticks
Making crispy cheese sticks at home is easier than you might think, and the results are incredibly satisfying. With just a handful of ingredients and a few simple steps, you can create a golden, cheesy snack that is full of flavour and perfect for any occasion. Whether you are a beginner trying this for the first time or a chef preparing appetisers for a menu, this method delivers consistent and delicious results. You will also learn how to cook them by either frying for maximum crispiness or baking for a lighter option.
Preparing the Spring Roll Pastry
Start by thawing the spring roll pastry if frozen. Keep the sheets covered with a slightly damp cloth to prevent them from drying out while you work. Take each sheet and cut it in half to form rectangles. These will be the wrappers for your cheese sticks.
Making the Cheese Filling
Choose one of the two fillings based on your preference.
- For the peri peri version, combine grated mozzarella and cheddar cheese, plain flour and peri peri seasoning in a bowl. Mix well until the spices are evenly distributed.
- For the herby version, mix grated mozzarella and cheddar with plain flour, onion powder, garlic powder and dried oregano. Stir thoroughly to ensure even seasoning.
The flour helps bind the cheese together and prevents it from leaking during frying.
Rolling and Sealing the Cheese Sticks
- Lay a rectangle of pastry on a clean surface with one of the short edges facing you
- Place a spoonful of filling about two centimetres from the bottom edge
- Fold the bottom edge over the filling, then fold in the sides and roll upwards tightly
- Mix plain flour and water into a smooth paste and use it to seal the edge
Repeat the process until all filling and pastry sheets are used.
Frying or Baking Your Cheese Sticks
To Fry
Heat oil in a deep pan to medium high heat. Fry the cheese sticks in small batches until golden and crispy. This usually takes about two to three minutes per batch. Drain on kitchen paper to remove excess oil
To Bake
Preheat your oven to 200°C. Brush each cheese stick with a light coating of oil. Place them on a baking tray lined with parchment paper. Bake for 12 to 15 minutes or until golden brown and crisp.
Common Mistakes to Avoid
- Overstuffing the pastry can lead to cheese leakage during cooking.
- Not sealing the edges properly may cause the rolls to open while frying.
- Cooking at too low a temperature can make the sticks greasy instead of crispy.
Follow these tips for the best results and enjoy restaurant-quality cheese sticks at home.
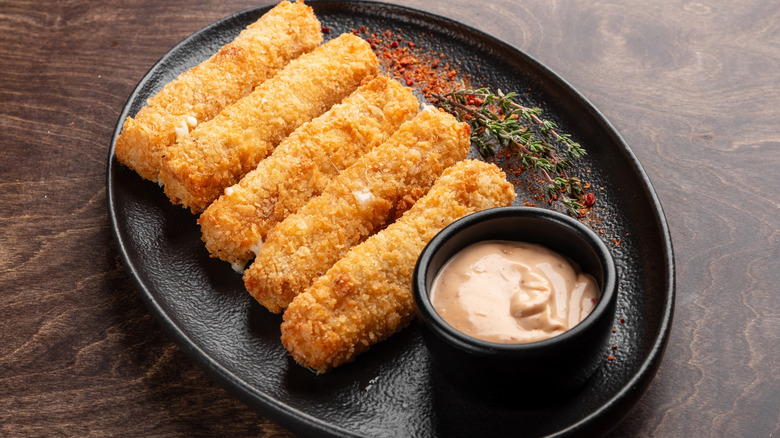
Serving Ideas and Dipping Sauces for Crispy Cheese Sticks
Once your crispy cheese sticks are golden and ready, the next step is serving them in a way that complements their flavour and makes them even more enjoyable. Here are a few ideas to elevate the experience, whether you are enjoying them at home or presenting them in a professional kitchen.
Best Sauce Pairings
Dips and sauces can take your cheese sticks from tasty to unforgettable. Here are some favourites that pair well with both the spicy peri peri version and the herby classic:
- Garlic mayonnaise: A creamy dip that enhances the cheesy filling.
- Sweet chilli sauce: Adds a mild, tangy contrast to the savoury centre.
- Sriracha yoghurt: A spicy yet cooling option, perfect for the peri peri flavour.
- Classic tomato ketchup: Always reliable and kid-friendly.
Homemade marinara sauce. Especially good with the herby cheese sticks.
You can serve the dips in small ramekins for easy sharing, or drizzle them lightly over the sticks for a gourmet presentation.
Ideal Occasions for Serving
These cheese sticks are more than just a quick snack. They can be featured in a variety of settings:
- Party platters and appetiser trays.
- Afternoon tea or vegetarian finger food buffets.
- Lunchbox snacks for kids and adults.
- Pub style bar snacks or café starters.
- Restaurant side dishes or vegetarian options.
They are best served hot and fresh, but they hold their texture well for up to 30 minutes after cooking, making them great for gatherings.
Tips for Perfect Cheese Sticks Every Time
Getting crispy cheese sticks just right can make all the difference between a decent snack and a truly irresistible one. Here are a few essential tips to help you achieve the best flavour, texture and overall result.
How to Avoid Soggy or Leaky Cheese Sticks
Cheese sticks should be crisp on the outside and gooey in the middle. To achieve this balance, keep the following in mind:
- Do not overfill the pastry. Use just enough cheese mixture to form a tight roll without bulging.
- Seal the edges properly using a flour and water paste. A loose seal will lead to the cheese leaking out during cooking.
- Maintain the right oil temperature if frying. Medium high heat is best. If the oil is too cold, the sticks will absorb it and become greasy.
- Let them rest on kitchen paper after frying to remove excess oil and keep the crust crisp.
Making Ahead and Storing
If you want to prepare in advance or keep leftovers, here is how:
- To store uncooked cheese sticks, roll them up and place them in an airtight container with parchment paper between each layer. Keep refrigerated for up to 24 hours.
- To freeze, place the rolled uncooked cheese sticks on a tray and freeze until firm. Then store in freezer bags. They can be fried or baked directly from frozen, just allow a few extra minutes of cooking time.
- To reheat cooked sticks, place them in an oven at 180°C for 5 to 7 minutes. Avoid microwaving, as this softens the crispy pastry.
These tips help ensure every bite remains delicious, whether served fresh or saved for later.
Wrap-Up and Tips to Make the Best Cheese Sticks
After trying this crispy cheese sticks recipe, you might find yourself making it again and again. It is simple, satisfying and easy to customise, making it a favourite in both home kitchens and professional settings. Whether you are serving them to guests, packing them in lunchboxes or adding them to your café menu, these cheese sticks always deliver on crunch and flavour.
Try the Recipe, Share Your Version
Now it is your turn. Give the recipe a go and do not be afraid to make it your own. Try new seasoning blends, experiment with different cheeses or create your own signature dipping sauce. If you do, we would love to see it. Share your version on social media and tag us so we can feature your creations.
Explore More Recipes and Stay Connected
If you enjoyed this recipe, be sure to explore more quick and flavourful ideas on our blog. From vegetarian snacks to party ready appetisers, we have something for everyone. Do not forget to subscribe for updates and leave a comment below with your feedback or questions. We love hearing from you.
Frequently Asked Questions About Crispy Cheese Sticks
These questions cover preparation, ingredient swaps, cooking methods and storage, helping you avoid common mistakes and adapt the recipe to suit your preferences or dietary needs.
Yes, you can. To make gluten-free cheese sticks, you will need to use gluten-free spring roll pastry or rice paper wrappers as an alternative. You should also replace plain flour with a gluten-free flour blend when sealing the rolls or mixing with the cheese. Always check the labels to ensure the cheese and spices used are also gluten-free.
Absolutely. Air frying is a great option for reducing oil without sacrificing too much crunch. Preheat your air fryer to 200°C. Brush the cheese sticks lightly with oil and cook for 8 to 10 minutes, turning once halfway through. Keep an eye on them to prevent burning, as cooking times can vary between air fryer models.
Yes, both cooked and uncooked cheese sticks can be frozen. For best results:
Freeze uncooked sticks individually on a tray before transferring to a freezer-safe bag or container. This prevents them from sticking together.
When ready to cook, fry or bake from frozen without thawing. Just add a few extra minutes to the cooking time.
To freeze after cooking, let them cool completely, then freeze in a single layer. Reheat in the oven for a crispy finish.
While mozzarella and cheddar create the ideal balance of melt and flavour, you can experiment with others. Try:
– Gouda for a mild, creamy result
– Pepper jack for extra heat
– Parmesan in small amounts for a sharper, saltier flavour
– A mix of your favourite vegetarian cheese substitutes if avoiding dairy
Just make sure any cheese used melts well and is not too watery, or it may affect the consistency of the filling.